-
Presentazione della serie FP Ledcheer: Un solido display a LED all'aperto costruito per prestazioni e affidabilità
-

Serie Flexible di allegria RS: La soluzione di visualizzazione del noleggio LED flessibile per qualsiasi evento
-

Canton Fair 2025 Anteprima: Tendenze del display a LED che non puoi perdere - approfondimenti da Ledcheer
2024-12-02
Costruire il tuo display a LED all'aperto è un processo divertente e appagante che ti consente di dare vita alle tue idee nel tuo ambiente e trasmettere messaggi o creare decorazioni per eventi e pubblicità. I principali elementi dei progetti di segni possono essere utilizzati per creare una soluzione di segnaletica efficace per l'uso esterno quando si incorpora un po 'di pianificazione. Di seguito troverai tutto ciò che devi sapere dalla scelta dei materiali e dalla connessione degli alimentatori alla programmazione del display e alla protezione dagli elementi. Ora è il momento di esplorare Come realizzare un display a LED esterno.

Comprensione delle basi: Cos'è un display a LED all'aperto?
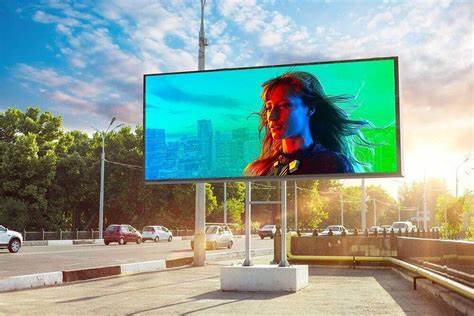
Un display a LED esterno è uno schermo elettronico composto da un LED che produce immagini e video luminosi e ad alto contrasto. Queste unità sono pensate per l'uso all'aperto rendendole adatte alla pubblicità, segni, e schede di informazione generali. A seconda delle dimensioni del progetto, che può variare da un piccolo cartello a LED a un cartellone gigante, L'aria aperta utilizza i moduli LED come strumento principale per attirare l'attenzione dello spettatore. Ecco alcuni dei componenti principali di cui avrai bisogno:
• Moduli a LED: Queste sono le basi del tuo display ed è il loro compito fornire una parte visiva.
• Sistema di controllo: Seleziona il tipo di contenuto verrà visualizzato e il modo in cui verrà visualizzato sullo schermo.
• Alimentazione elettrica: Mantiene una tensione costante in quanto la corrente scorre costantemente attraverso i moduli LED.
• Materiali a prova di tempo: Aiuta a bandire lo schermo dagli effetti duri del tempo come pioggia e sole.
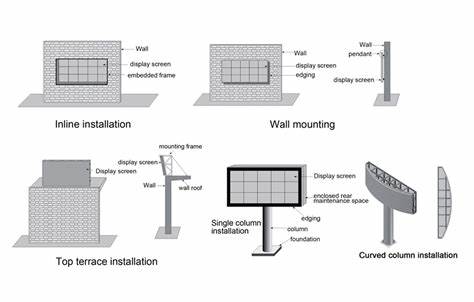
• Struttura o struttura di montaggio: Materiali solidi come alluminio o acciaio, Per prestare la stabilità della struttura.
• Sensore di luminosità: Controlla automaticamente l'intensità della luce in una stanza in base alle attuali condizioni di illuminazione che portano al risparmio energetico e all'illuminazione sufficiente.
• Cavi e connettori dei dati: Cavi di buona qualità per ridurre al minimo le perdite per interferenza del segnale.
Pianificare il tuo display a LED: Misurare, Risoluzione, e posizione
Prima di iniziare l'assemblea c'è qualcosa che dovresti fare in modo da poter avere un'idea di ciò che l'impresa comporta. Considera i seguenti fattori:
Dimensione e risoluzione del visualizzazioni
Le loro dimensioni dipenderanno quindi dall'uso previsto del display. Ad esempio, un grande Segno a LED come cartellone pubblicitario potrebbe richiedere un'alta risoluzione in un altro caso; Il piccolo segno a LED andrà bene con una risoluzione ridotta.
• Dimensione del pannello LED: Espresso in millimetri che in realtà indica lo spazio tra i LED. Una figura inferiore è un'indicazione di un numero maggiore di pixel per area, e quindi un'immagine di qualità migliore.
• Bisogni di risoluzione: Quando il pubblico sarà vicino al display, è meglio optare per un'elevata densità di pixel del pannello per evitare la pixelation. A causa della visione a lunga distanza, è fatto con una risoluzione inferiore.

Posizione e visibilità
Seleziona un luogo che consentirà un facile fissaggio e aumenta l'esposizione del segno. Assicurati che non sia bloccato da edifici o alberi e debba essere impostato nel miglior angolo a seconda di chiunque tu stia per soddisfare.
Condizioni ambientali
I display a LED esterni devono anche essere in grado di essere resoconti e nevicati e tutte le altre forme di tempo che possono essere vissute. La degradazione della luce alogena e ultravioletta può ridurre la durata e la chiarezza del pannello, Pertanto è rilevante l'impermeabilizzazione.
Guida passo-passo per la costruzione del tuo display a LED esterno
Fare un passo 1: Assemblaggio del telaio
Prima di tutto, Costruisci una base stabile per il tuo display, e dopo quello, sarai in grado di gestire qualsiasi situazione da solo. Pensavi che ciò avrebbe aiutato a supportare i moduli a LED e impedire a qualsiasi pressione superficiale di raggiungere i moduli.
• Misura i moduli: Somma tutta l'area principalmente moltiplicando il numero di moduli con la dimensione dei moduli.
• Costruisci la cornice: Seleziona materiale come materiale in alluminio a causa della sua resistenza alle condizioni meteorologiche. Il telaio dovrebbe anche essere abbastanza forte per soddisfare le possibili reazioni dall'ambiente esterno.
Fare un passo 2: Montare i moduli LED
Il tuo telaio è completo ed è ora il momento di collegare le tue unità a LED per iniziare ad illuminare la struttura.
• Allinea i moduli: È anche importante che ciascuno di essi venga posizionato appena sotto l'uno dell'altro in modo che ogni modulo appaia al centro della cornice. Se necessario, l'uso distanti per assicurarsi che siano uniformemente distanziati l'uno dall'altro.
• Proteggere i moduli: Avvitare saldamente ogni modulo per una migliore stabilità sulla nave. Garantire i cavi, sono rapidamente e saldamente fissati in modo da poter affrontare? Venti o vibrazioni all'interno dell'area.
Fare un passo 3: Collegamento dell'alimentazione
Fornire il display a LED esterno deve avere una connessione adeguata per prevenire i cortometraggi o danneggiare.
• Seleziona la giusta tensione e wattaggio: Non sovraccaricare mai i moduli a LED assicurandosi che abbiano poteri simili.
• Collegare ogni modulo all'alimentazione: Assicurati di utilizzare connettori resistenti all'acqua per evitare qualsiasi caso in cui l'acqua filtra.
• Tensione di test: Al completamento della connessione come descritto sopra, utilizzare un contatore di tensione per verificare che ciascuno dei moduli stia ricevendo la giusta tensione.
Fare un passo 4: Implementazione del sistema di controllo e della programmazione
Il sistema di controllo, o scheda controller, è la parte di lavoro centrale di un sistema di visualizzazione a LED. Qui è dove imposterà opzioni di visualizzazione e input Questo è anche dove si codifica nei contenuti che si desidera visualizzare.
• Installare la scheda del controller: Dovrebbe essere messo in una comoda area ben contenuta del display.
• Connettiti ai cavi di alimentazione e dati: Tutti i moduli devono essere collegati alla scheda di controllo.
• Carica software: La maggior parte dei controller a LED sono integrati con il software per l'impostazione della mappatura dei pixel, luminosità e persino programmazione dei contenuti.
• Test e calibrazione: UN Short Test Run per verificare se tutto il contenuto viene visualizzato correttamente e le impostazioni di luminosità sono adatte per l'uso all'aperto.
Fare un passo 5: Affrontare il display
Le condizioni meteorologiche sono piuttosto impegnative per le attrezzature per operare, Quindi la protezione contro di loro è inevitabile.
• Bordi sigillanti: Abbiamo raccomandato l'uso del sigillante in silicone sul perimetro di ciascun modulo e in luoghi in cui vengono effettuati collegamenti elettrici per evitare la penetrazione dell'umidità nei moduli.
• Connettori impermeabili: Vari connettori sono disponibili sul mercato ma scegli connettori speciali adatti per applicazioni esterne.
• Protezione UV: Usa il film di colore laminato o protettivo UV in cima in modo da non cambiare il suo colore o farlo diventare molto caldo dal sole diretto.
Ottimizzazione del tuo display a LED esterno per l'efficienza energetica
I display esterni sono alti, Quindi l'implementazione di tecniche di risparmio energetico può aiutare a ridurre i costi operativi:
• Regolazione della luminosità automatica: Impiegare le luci che possono sensibilizzare alla varianza nella quantità di luce presente in un particolare ambiente.
• Funzionamento programmato: Riduci il tempo di visualizzazione a quei momenti in cui attirerà una grande quantità di visitatori.
• Alimentazione efficiente: Per eliminare i rifiuti selezionare quegli PSU che hanno ricevuto alti tassi di efficienza.
Conclusione
Costruire il tuo display a LED esterno è un modo fantastico per personalizzare la segnaletica per gli eventi, aziende, o anche progetti personali. Con un'attenta pianificazione, Materiali di qualità, e manutenzione regolare, Puoi goderti un vibrante, display che attira l'attenzione che resiste agli elementi. Per una serie di kit LED e strumenti di manutenzione, Visita il nostro Sezione Prodotti a LED sul nostro sito Per iniziare il tuo progetto.


